Sunday, October 10, 2010
Time Flies!!
It always amazes me how fast time flies. I wish we could pick a day a month where we could control how fast the day goes and just have a r e a l l y slow day to enjoy everything we like to do. It seems like it was just July and October is already almost half over. I know someday I will be less busy and will be able to live at a slower pace, and I will probably not like it much then, but it sounds great now!

Tuesday, September 21, 2010
September Stamp of the Month
Here is a card I made from September's Stamp of the Month-Thriller. I stamped the image in black and then embossed it with clear embossing powder. Then I used the new Sunset ink and sponged it on the bottom of the image and then blended in sunflower on the top half of the image. I got this idea from my upline, Lori Leng The card is 5x7 black CTMH cardstock. I sanded it to give it a worn look. I then used some scraps from the Hooligans Kit of the Month on the bottom of the card. I used some black grosgrain ribbon and a couple of the black opaques. The sentiment is from the Thriller stamp set as well. I hope you like it.


Saturday, September 11, 2010
Hooligans Kit of the Month
My kit of the month club starts this month!! Be one of the first five to sign up and receive a special free D-size stamp from me. Here are the benefits to joining my Kit of the Month Club:
* Complete at least 30 layouts at the end of the 5 months!!
* During hostess month receive at least $25.00 in free products
* During hostess month receive free Stamp of the Month
* Learn new scrapbooking techniques
* Have fun!!
This does require a 5-month commitment. You must place a $30.00 minimum order each month. You can complete the layouts at my home on the specified date, or you can do them on your own if you are not able to attend the club meeting date.
As I indicated, as added bonus, the first 5 people to sign up will receive a special, free D-size stamp from me. You must sign up by September 17 to participate. Please e-mail me (dforbord@frontiernet.net) to sign up today.
Here are the layouts we will be doing this month:


I didn't embellish the last page yet - but wanted to show how even though these are Halloween papers, you could use them for non-Halloween layouts
* Complete at least 30 layouts at the end of the 5 months!!
* During hostess month receive at least $25.00 in free products
* During hostess month receive free Stamp of the Month
* Learn new scrapbooking techniques
* Have fun!!
This does require a 5-month commitment. You must place a $30.00 minimum order each month. You can complete the layouts at my home on the specified date, or you can do them on your own if you are not able to attend the club meeting date.
As I indicated, as added bonus, the first 5 people to sign up will receive a special, free D-size stamp from me. You must sign up by September 17 to participate. Please e-mail me (dforbord@frontiernet.net) to sign up today.
Here are the layouts we will be doing this month:


I didn't embellish the last page yet - but wanted to show how even though these are Halloween papers, you could use them for non-Halloween layouts
Saturday, August 28, 2010
Birthday Card

Here is a birthday card I made for my bosses daughter. The flower stamp and sentiment are CTMH. The flower patterned paper is from a DCWV stack (I think) and the green polka dot paper is Bo Bunny.
Friday, August 27, 2010
National Stamping Month

September is National Stamping month. To celebrate, Close to My Heart has created a great kit to give you three times the fun! Included in this Triple Play mini album kit is an exclusive stamp set, mini inks and enough paper and embellishments to make 3 cute mini albums. You can get this cute little kit in a variety of ways:
1) Purchase the kit outright for $29.95 (CC1010).
2) Place a minimum order of $25 in My Acrylix stamps (excluding Stamp of the Month sets, Workshops on the Go exclusive stamp sets, and K-size custom stamps) and purchase the kit for only $15 (CC1010A).
3) Place a minimum order of $40 in My Acrylix stamps (excluding Stamp of the Month sets, Workshops on the Go exclusive stamp sets, and K-size custom stamps) and purchase the kit for only $5/$5 (CC1010B).
4) Host a home gathering and get the Triple Play mini album kit free with party sales of $300 or more.
5) Sign up under me to become a CTMH consultant and the Triple Play mini album kit will be included free of charge in your consultant kit.
The Triple Play mini album kit is available through September 30, 2010, while supplies last. Be sure to get yours today.
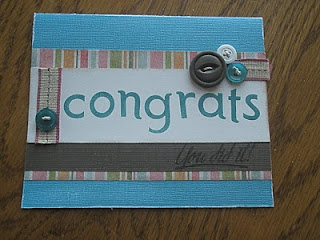
Graduation Card
We had a late graduation party to go to a couple of weeks ago. Here is the card I made. Hope you like it.

Tuesday, August 3, 2010
$2, $4, $6 for 8, It's YOU We Appreciate!!
In honor of our wonderful customers, Close To My Heart and I want to show our appreciation. So for 8 days only, there is going to be a BLOW OUT sale on my website for select Stickease Stickers ($2), Level One Paper Packs ($4) and Level Two Paper Packs ($6). This sale will start on August 4, 9am MST (11am Central) and will run through midnight (MST) on August 11.
The items in this sale will all be 'while supplies last' so make sure to order your favorites early for best selection. This is a great bargain and a great way to stock up on your favorites. Also, most of these items will be retired at the end of the year, so now is definitely the time to stock up.
The items in this sale will all be 'while supplies last' so make sure to order your favorites early for best selection. This is a great bargain and a great way to stock up on your favorites. Also, most of these items will be retired at the end of the year, so now is definitely the time to stock up.
You can only get these great deals from my website. Because this is such a great sale, sometimes CTMH servers will get bogged down due to the high traffic. One way to avoid some of this is to set up an account on my website ahead of time, if you haven't already done so. This will help when you check out. I have included a list of the items that will be on sale at the bottom of this message. Another time-saver may be to make your wish list ahead of time. Many of these items will sell out quickly, so be sure to order as early as you can.
Any purchase you make will also go toward our adorable Stamp of the Month "Something Splendid". You can also order all regular priced items at the same time so this is the time to stock up online and save big.
Vintage Travel Level 1 X7045A , Stickease X7045C
Discovery Level 1 X7056A
Heirloom Level 1 X7060A, Level 2 X7060B
Floral Impressions Level 1 X7061A,Level 2 X7061B, Stickease X7061B
Laid Back Level 1
Just Chillin Level 1 X7069A ,Stickease X7069C
Simple Pleasure Level 1 X7070A Level 2 X7070B, Stickease X7070C
Best Friends Forever Level 1 X7071A
School Zone Level 1 X7072A, Stickease X7072C
Abundance Level 1 X7073A, Level 2 X7073B, Stickease X7073C
More To Adore Level 1 X7075A, Level 2 X7075B, Stickease X7075C
Sonata Level 1 X7076A,Stickease X7076C
Sweet Harmony Stickease X7077C
Cutie Pie Level 1 X7078A, Stickease X7078C
Rough n Tumble Level 2 X7079B, Stickease X7079C
Route 66 Level 1 X7080A, Stickease X7080C
Majestic Blue Level 1 X7081A,Level 2 X7081B, Stickease X7081C
Expedition Level 1 X7082A, Stickease X7082C
Let's Get Together Level 1 X7083A
Floral Tapestry Level 1X7084A
Everlasting Level 1 X7085A,Level 2 X7085B, Stickease X7085C
Caprice Level 1 X7086A, Level 2 X7086B, Stickease X7086b
Enchanted Level 1 X7087A, Level 2 X7087B, Stickease X7087C
Free Spirit Level 1 X7088A, Level 2 X7088B, Stickease X7088C
Lifes Delights Level 1 X7089A, Stickease X7089C
Silhouette Level 1 X7090A, Level 2 X7090B, Stickease X7090C
it’s a Guy Thing Level 1 X7091A, Level 2 X7091B, Stickease X7091C
Good Times Level 1 X7092A, Level 2 X7092B, Stickease X7092C
Sweet Pea Level 1 X7093A, Stickease X7093C
Paper Garden Level 1 X7094A, Stickease X7094C
Boom-Di-Ada Level 1 7095A, Level 2 X7095B, Stickease X7095C
Blue Ribbon Level 1 X7096A, Level 2 X7096B, Stickease X7096C
Game On Level X7097A , Level 2 X7097B, Stickease X7097C
Sarsaparilla Level 1 X7098A , Level 2 X7098B, Stickease X7098C
Perfect Day Level 1 X7100A, Level 2 X7100B, Stickease X7100C
Magic Moments Level 1 X7101A, Level 2 X7101B, Stickease X7101C
Notebook Level 1 X7102A, Level 2 X7102B, Stickease X7102C
Aspen Level 1 X7103A, Level 2 X7103B, Stickease X7103C
Evensong Level 1 X7104A, Level 2 X7104B, Stickease X7104C
Emporium Level 1 X7105A, Level 2 X7105B, Stickease X7105C
Unforgettable Level 1 X7106A, Level 2 X7106B, Stickease X7106C
That’s Amore Level 1 X7107A, Level 2 X7107B, Stickease X7107C
Daydream Level 1 X7108A, Level 2 X7108B, Stickease X7108C
Stardust Level 1 X7109A, Level 2 X7109B, Stickease X7109C
Back Country Level 1 X7110A, Level 2 X7110B, Stickease X7110C
Moon Doggie Level 1 X7111A, Level 2 X7111B, Stickease X7111C
Animal Cookies Level 1 X7112A, Level 2 X7112B, Stickease X7112C
Tinkerin Level 1 X7113A, Level 2 X7113B, Stickease X7113C
Bella Level 1 X7114A, Level 2 X7114B, Stickease X7114C
Jingle Level 2 X7115B, Level 2 X7115B, Stickease X7115C
Sweet Home Level 2 X7116A, Level 2 X7116B, Stickease X7116C
Grace Level 1 X7117A, Level 2 X7117B, Stickease X7116C
Twitterpated Level 1 X7118A, Level 2 X7118B, Stickease X7118C
Make Your Own Background Paper
I watched a class from Tresa Black (LOVE HER!!) She teaches the most amazing techniques. Check out her blog here. She taught a class where she made all of her own background paper using stamps and inks. I thought I'd give it a shot.
Here is the paper that I made. I started with a piece of colonial white cardstock.

Here is the layout that I made from that paper. I also stamped a background onto the green and pink cardstock.

Here is the paper that I made. I started with a piece of colonial white cardstock.

Here is the layout that I made from that paper. I also stamped a background onto the green and pink cardstock.

Wednesday, July 14, 2010
Splendor WOTG


Here are a couple of layouts I made from the Splendor Workshop on the Go. Instead of doing the second layout that was featured in the kit, I decided to make the Dialogue one from the Imagine book. I do need to put one more picture in the layout, but I had to wait to get it from someone else. It was a picture of everyone that attended our fish fry.
Friday, July 2, 2010
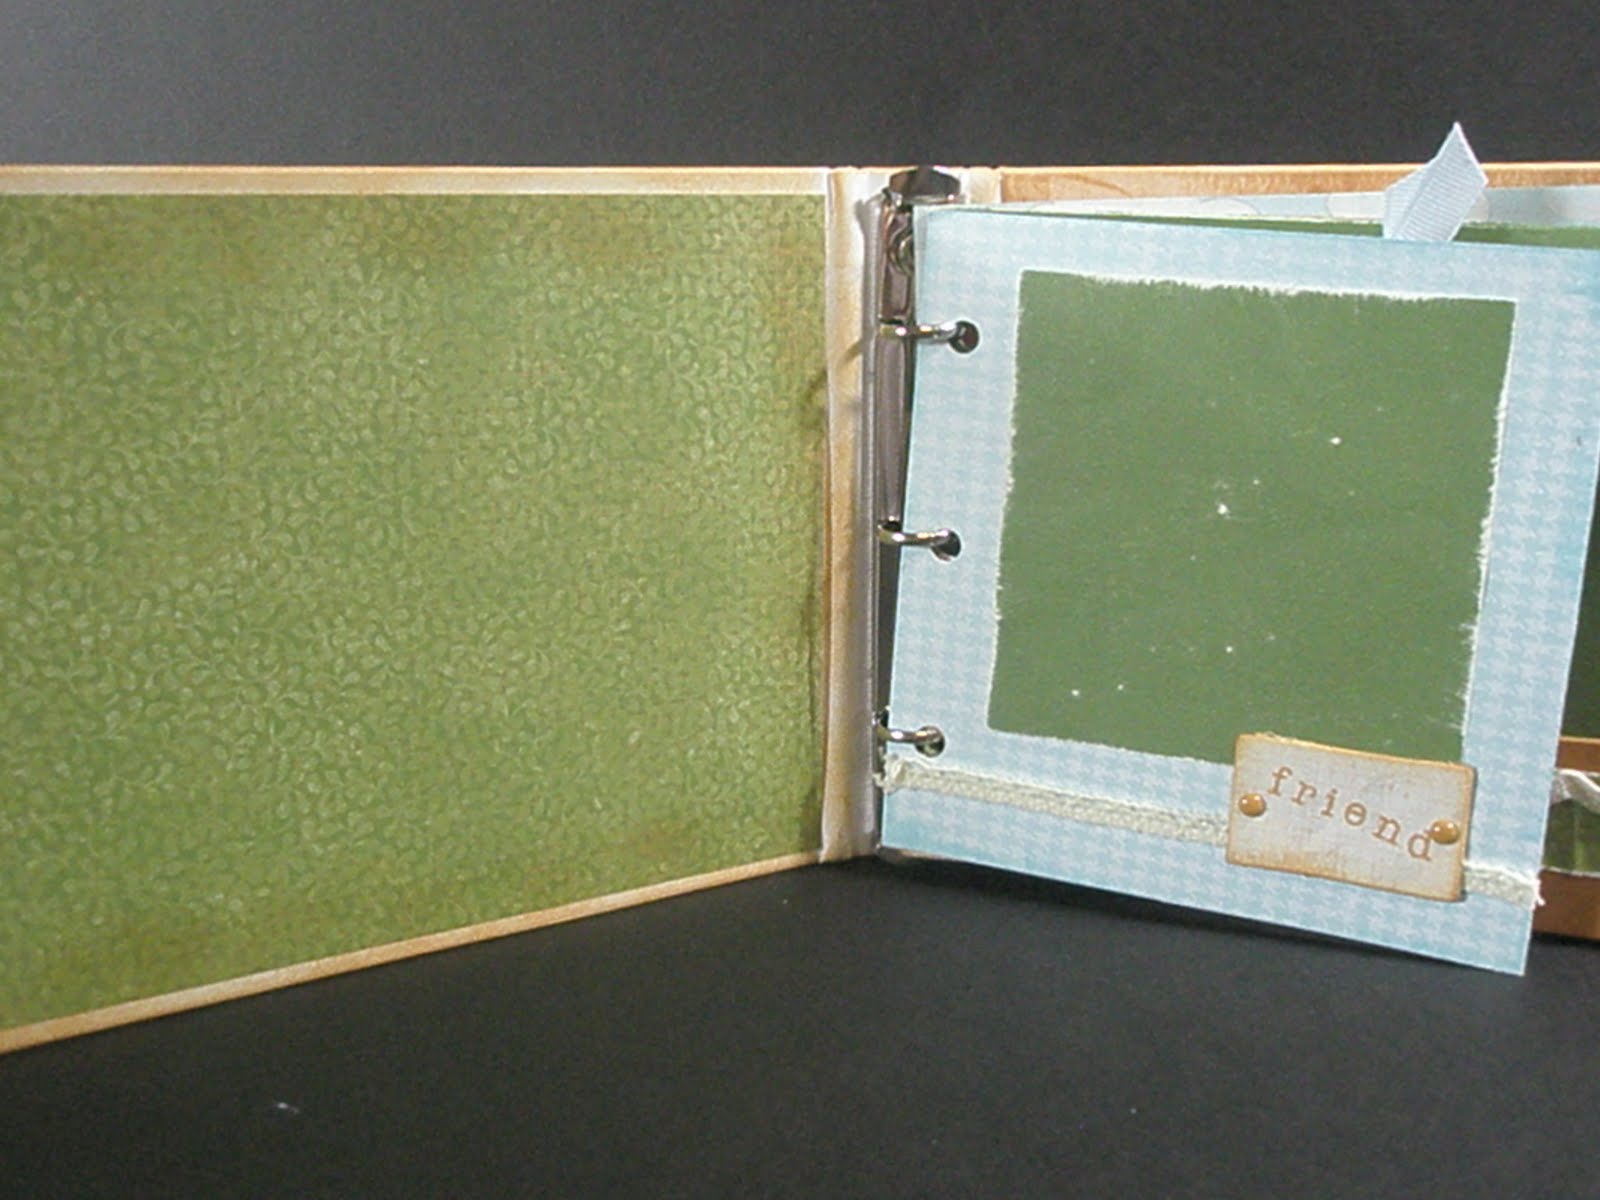
CTMH Splendor Mini-Album
Check out these pictures from a mini album I made after being inspired by Teresa Black/The Stamp Goddess! Check out her website here. She is awesome! I followed the video series she did and it was really simple. Let me know what you think.



Tuesday, April 27, 2010
May Is a Very Exciting Month!!!
Close To My Heart's Spring/Summer 2010 Idea Book will be going live May 1!! And I know you guys are going to absolutely LOVE everything in this book. From the fresh, new paper kits, to the useful new products, I think everyone will find something they can't do without! I have scoured the new book and made some purchases and I am in the process of creating some BEAUTIFUL things I will share with you very soon.
 In honor of National Scrapbooking Month, CTMH designed this very pretty paper kit that you can buy or even get free!! The 'Miracle' kit is available now through the month of May. The kit includes everything you'll need to create two fabulous double page layouts. You'll be able to get your kit multiple ways:
* Purchase the kit for $19.99 plus shipping and tax
 In honor of National Scrapbooking Month, CTMH designed this very pretty paper kit that you can buy or even get free!! The 'Miracle' kit is available now through the month of May. The kit includes everything you'll need to create two fabulous double page layouts. You'll be able to get your kit multiple ways:
* Host a gathering during the month of May and have sales of $300 or more = Get if FREE
* Become a consultant on my team for only $99 during the month of May = Get it FREE in your consultant kit
* Purchase $60 in retail product April 15- May 31st = Pay only $5
* Purchase $40 in retail product April 15 - May 31st= Pay only $10
* Purchase the kit for $19.99 plus shipping and tax
There are two really cool "tools" that you will get with your kit that help to make it a 'miracle'. First are FLIP FLAPS. What are Flip Flaps you ask? They are clear 'pockets' to put your photos in that will attach to your layout so that you can include multiple pictures without losing your design. The other neat thing that comes in the kit are IRRISTIBLES. They are chipboard pieces that have an ink resist marking on them that you can color any way you like that will complement your photos. They are almost like magic!! Like I said, I am completing my kit and will share it with you later in the week so you can see how amazing this kit is. The other really cool thing that CTMH is premiering is Studio J, which is actually available starting today! This is a digital scrapbooking feature, that is oh so much more than just digital scrapbooking. All you'll need to do is go to my website http://dotforbord.myctmh.com/ and you will find a link that will connect you to the STUDIO J program. You can choose from some of our most loved paper packs and even some STUDIO J exclusives. There are many designer layouts to choose from and you can add our exclusive mini medleys accents, distress your pages, even add our stickease stickers and more. The best part is you can do all of this FOR FREE!!!!! We do not charge for our software like some other companies. You can upload your pictures and create your layouts free of charge. When you're ready to make an album you can purchase your layouts for an introductory price of only $12.95 for a double layout. For a better deal, order 5-9 layouts and get five free memory protectors. The best deal is to order 10 layouts and get 10 page protectors FREE and FREE SHIPPING. So go to my website here and check it out. If you have any questions, please e-mail or call me.
 The other really cool thing that CTMH is premiering is Studio J, which is actually available starting today! This is a digital scrapbooking feature, that is oh so much more than just digital scrapbooking. All you'll need to do is go to my website http://dotforbord.myctmh.com/ and you will find a link that will connect you to the STUDIO J program. You can choose from some of our most loved paper packs and even some STUDIO J exclusives. There are many designer layouts to choose from and you can add our exclusive mini medleys accents, distress your pages, even add our stickease stickers and more. The best part is you can do all of this FOR FREE!!!!! We do not charge for our software like some other companies. You can upload your pictures and create your layouts free of charge. When you're ready to make an album you can purchase your layouts for an introductory price of only $12.95 for a double layout. For a better deal, order 5-9 layouts and get five free memory protectors. The best deal is to order 10 layouts and get 10 page protectors FREE and FREE SHIPPING. So go to my website here and check it out. If you have any questions, please e-mail or call me.
Friday, February 26, 2010
mini album
Here is a mini album that I made for a friend at work for her birthday. I did give her another give, too, but this was just something I added to it. I found the directions to this on a blog or You Tube or something. I wrote down the directions on a piece of paper, but I forgot to write down the author of the blog. So if you see this and it was you that made the tutorial, or you know who did, please let me know so I can give proper credit.
This is made with just one sheet of 12x12 paper. You cut and fold it a certain way and then emboss to your liking. If you would like the actual instructions let me know and I will gladly share them -- just remember that I didn't 'create" them.


Here is the birthday card I made for her to go with her gift. You can't really tell from this picture (again, it's a good thing I'm not a professional photographer), but the flower is made from decreasing sized circles I cut with George, then crumpled them up and assembled them with the button holding them together.

This is made with just one sheet of 12x12 paper. You cut and fold it a certain way and then emboss to your liking. If you would like the actual instructions let me know and I will gladly share them -- just remember that I didn't 'create" them.


Here is the birthday card I made for her to go with her gift. You can't really tell from this picture (again, it's a good thing I'm not a professional photographer), but the flower is made from decreasing sized circles I cut with George, then crumpled them up and assembled them with the button holding them together.

Thursday, February 25, 2010
My Sweet Valentines!!
So the story of my life is that I am late for everything!!!! Here are pictures of what I made for my loved ones on Valentines Day.
This was for my 16 yo son who loves chocolate and gum!! I think he didn't even noticed how it was packaged as long as he got to the chocolate!!
(OK use your imagination here!! I know I uploaded the pictures, but they aren't there -- and I already deleted them from my camera. I'd take them again, but the cover to the mailbox is already missing!!)
This was for my 12 yo daughter, who loves candy, period!! She did give it up for lent, so I didn't put so much in her mailbox. Many hears ago, I started the tradition of giving her a stuffed frog on Valentine's Day. I think she looks forward to seeing what kind of frog I can find each year more than what 'treats' she is getting..... I forgot to take a picture of the frog, though.

And this is the card I made for my hubby. Of course I finished all of these right before dinner that night when I handed them out. Someday I will learn how to get things done sooner so it isn't so stressful!!

This was for my 16 yo son who loves chocolate and gum!! I think he didn't even noticed how it was packaged as long as he got to the chocolate!!
(OK use your imagination here!! I know I uploaded the pictures, but they aren't there -- and I already deleted them from my camera. I'd take them again, but the cover to the mailbox is already missing!!)
This was for my 12 yo daughter, who loves candy, period!! She did give it up for lent, so I didn't put so much in her mailbox. Many hears ago, I started the tradition of giving her a stuffed frog on Valentine's Day. I think she looks forward to seeing what kind of frog I can find each year more than what 'treats' she is getting..... I forgot to take a picture of the frog, though.

And this is the card I made for my hubby. Of course I finished all of these right before dinner that night when I handed them out. Someday I will learn how to get things done sooner so it isn't so stressful!!

Wednesday, February 24, 2010
Another Picure Frame
I am a little late in posting this, but here is another frame that I made for my mom for Christmas from my kids. I started with an unfinished frame from Michaels and then glued a sheet of patterned paper onto it. Then I stamped some images using some of my CTMH stamps and then glued smaller pictures of the kids on there as well. My niece took these pictures for me last fall. She is a really awesome budding photographer.
I think I need to have her help me learn how to take better pictures!! Sorry for the poor quality in my pictures. I will figure out how to take better ones sooner or later!!

I think I need to have her help me learn how to take better pictures!! Sorry for the poor quality in my pictures. I will figure out how to take better ones sooner or later!!
Tuesday, February 23, 2010
Picture Frame
Hey all. I think this may be the coolest thing I have ever made!!!! I took a class at my LSS (local Scrapbooking Store) last fall using several distress methods using Tim Holtz products. The store owner had taken a class using his distress inks, distress embossing powders and distress stickles. They embellished the frame around a small mirror. Well, I remembered this when I was thinking of something to give my very bestest friend when she turned 40 in December. I had a really great picture of 4 of our close friends, and thought I would make a picture frame instead of the mirror. I bought a $1.00 unfinished frame at Michaels. I painted it dark brown with some acrylic paint. Then I cut 1" square pieces in chipboard to cover the entire outer surface. I inked each square using one of 5 colors. Then some I used the embossing powder on, some the stickles and some I stamped. Then I glued them all on the frame (a very long process!) and then added some dimensional embellishments. When it was done, I was SO proud of myself. It was very hard to give it away!! So hard, that I am going to make one for myself just like it. This project did take me a long time --- and I wasn't able to give it to her until last week! But I wanted to make it just right, so I took my time -- and I'm glad I did.
Here is the picture of the frame......

and here it is with our perfect picture in it.......
 I would love to hear your comments on this. The pictures here really don't do it justice. I have never been more proud of anything that I have made!
Here is the picture of the frame......

and here it is with our perfect picture in it.......
 I would love to hear your comments on this. The pictures here really don't do it justice. I have never been more proud of anything that I have made!
Monday, February 15, 2010
Paper Bag Album
Here is a paper bag album I made for one of my daughter's friends. She is moving to a different state at the end of the school year, so I thought for her birthday my daughter could give her this album so she can have a place to remember all of her FL friends after she moves. This was my first paper bag album and I learned a lot on what to different for my next one! But I still think it turned out cute and Eva LOVED it!

I used the cover from a 'premade' photo album and glued my paper bag album inside. I learned this technique from Kathy at Paper Phenomenon. If you haven't checked out her blog, you need hop on over there. She is amazing! Anyway, I used just your regular paper bags from the grocery store that you would use for a lunch. I will not be doing that again. The folds didn't really match up. I would definitely use the ones from Michaels on my next project. Here are the rest of the pictures. I hope you enjoy them.
 In addition to the tags in the pockets made in the flaps of the bags, I also put a big tag in the larger side of the page. She can put a couple of pictures or do some journaling on these tags. I forgot to take a picture of the bigger tags. We literally finished the album, took a few pictures and then ran out the door to get to the party. That is why the quality of the pictures isn't very good, either. I wish I wasn't such a procrastinator.....


This was my favorite page. The saying was something that referenced friends and I loved the little heart charm.


I used the cover from a 'premade' photo album and glued my paper bag album inside. I learned this technique from Kathy at Paper Phenomenon. If you haven't checked out her blog, you need hop on over there. She is amazing! Anyway, I used just your regular paper bags from the grocery store that you would use for a lunch. I will not be doing that again. The folds didn't really match up. I would definitely use the ones from Michaels on my next project. Here are the rest of the pictures. I hope you enjoy them.
 In addition to the tags in the pockets made in the flaps of the bags, I also put a big tag in the larger side of the page. She can put a couple of pictures or do some journaling on these tags. I forgot to take a picture of the bigger tags. We literally finished the album, took a few pictures and then ran out the door to get to the party. That is why the quality of the pictures isn't very good, either. I wish I wasn't such a procrastinator.....


This was my favorite page. The saying was something that referenced friends and I loved the little heart charm.

Subscribe to:
Posts (Atom)
Popular Posts
-
 I received a very nice blog award, my first one, from Heather ( chevygirl ). Thank you, Heather. First you should check out her blog by cl...
 -
Here are pictures of the book I made for my daughter's softball team. 7 of the 9 girls on her team have played together since Kindergar...
-
 Last but not least for today, I made a gift card holder for my daughter's friend. Andi made the birthday card, but she asked me to make...
 -
Have you heard of Scrap Sketch?? If not, you should check it out. Each week they have a challenge open to anyone, plus sketches that the d...
-
 Hey all. I think this may be the coolest thing I have ever made!!!! I took a class at my LSS (local Scrapbooking Store) last fall using ...
 -
My LSS had a bunch of books and other creative things she had made in a basket. I saw a coupon holder that was very adorable and knew I had...
-
 Can you believe it is already September 25?? Why is the summers/falls so so fast and winter goes sooooo slow?? Since it is almost the end ...
 -
 Over the next week or so, I will be posting a few projects/cards that I have made but hadn't had a chance to post yet. The first is thi...
 -
I have challenged myself to be better about updating my blog. I am going to try to post at least every three days, whether I have done some...
-
Please check out the retiring tab above for a link to my website and the items that will be retired on July 31, 2014. Please note there are...


